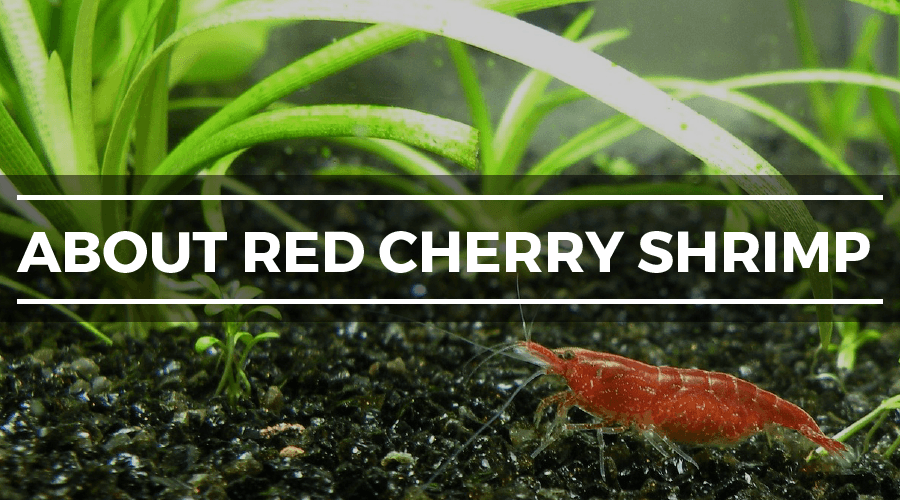
Red Cherry Shrimp (Neocaridina davidi) are one of the most common types of freshwater aquarium shrimp in the world. They are excellent shrimp for fish-keepers of all skill levels and are available in tons of different colors and variations.
In this complete guide, out team cover everything there is to know about Red Cherry Shrimp. This post will probably be pretty long, so use the navigation links below if you’re only looking for a specific section.
About Red Cherry Shrimp
- Scientific Name: Neocaridina davidi
- Temperament: Peaceful
- Care Level: Easy
- Native Origin: Taiwan
- Common Names: Red Cherry Shrimp, Cherry Shrimp, RCS
- Life Span: 1-2 years
For beginners looking to get into shrimp keeping, Red Cherry Shrimp (Neocaridina davidi) are considered the go-to species. They are simple to care for, colorful, and easy to breed – compared to other species of dwarf shrimp, Red Cherry tanks are pretty simple to set up and keep.
Red Cherry Shrimp are a peaceful species, but are usually best off in shrimp-only tank. Because of their small size, Red Cherries often become unfortunate snacks for hungry fish.
Variations of Neocaridina davidi
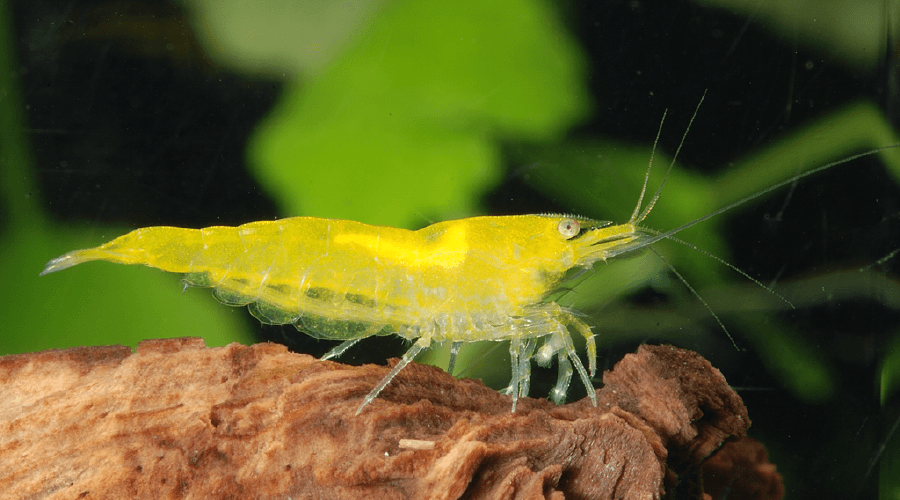
Neocaridina davidi have been made famous for their bright red coloration, but many aquarists don’t know that they are available in tons of different colors – blue, orange, yellow, green, and black and just a few variations. These variations have all been produced through years and years of selective breeding.
Blue Velvet Shrimp are the most common variation of Neocaridina davidi behind Red Cherries and are growing in popularity. They are just as easy to care for, but are a little more expensive/harder to find. For those looking for something different than Red Cherry Shrimp, I would definitely recommend checking out the different varieties.
Red Cherry Shrimp Grades
If you’re starting up a tank and shopping around for your Red Cherry Shrimp, you will probably notice that they are are labeled as a specific grade. Here are all of the Cherry Shrimp grades and what they mean – from the lowest grade to the highest:
- Cherry (Lowest Grade): Mostly transparent body with light red spots – completely transparent legs
- Low Sakura (Low Grade): Light red body with light colored or transparent legs – bottom half of body near the legs is usually more transparent than the rest of the body
- High Sakura (Medium Grade): Almost completely red – only small parts of the body and legs are transparent
- Fire Red (High Grade): Completely red with no flaws in body or legs
- Painted Fire Red (Excellent Grade): Completely red with zero flaws – darker shade with a more opaque shell
If you’re just starting out, I highly recommend buying a high quality breeder pack. Large, high grade colonies (which doesn’t take long at the rate that these shrimp reproduce) can pay for themselves in no time.
Don’t worry, we will discuss exactly how to breed Red Cherry Shrimp further down in the article.
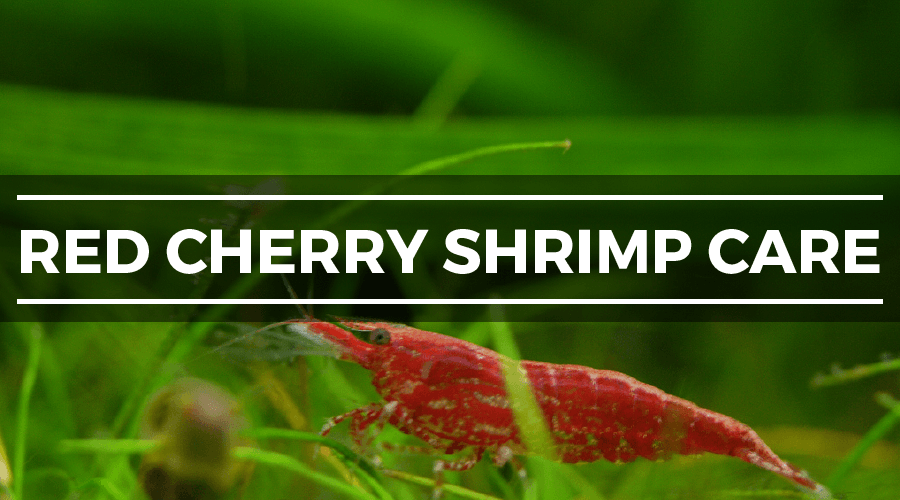
Red Cherry Shrimp Care
Red Cherry Shrimp are one of the easiest freshwater aquarium shrimp to care for. That being said, there are a few things you should keep in mind if you’re thinking about keeping this species:
Requirements
One of the best things about keeping dwarf shrimp is the fact that they don’t require large tanks – in fact, a 10 gallon aquarium should be just fine. Some aquarists keep Cherries in tanks as small 5 gallon, but this isn’t the best idea if you want to grow a large colony.
More important than tank size is making sure your tank is completely cycled before introducing any shrimp. I am a huge fan of the fishless cycle since no fish are harmed. In addition, you should test your water often to make sure that no ammonia, nitrite, or nitrate is present – dwarf shrimp are hypersensitive to these toxins.
Bi-weekly or monthly water changes are a great way to keep your shrimp happy and healthy.
Water Parameters
Dwarf Shrimp are much more sensitive to changing water parameters than fish. As a result, keeping your parameters stable should be your #1 concern. Here are a few key levels you should keep your eye on:
- Temperature: 65-85°F
- ph: 6.3-8.0
- Total Dissolved Solids: 150-250
Like I said before, Red Cherry Shrimp and pretty accepting when it comes to water condition. What they DON’T like is massive swings in temperate/pH.
Something I see way too often among beginners is trying to get their water parameters to the perfect spot. Unintentionally, they end up swinging their parameters from one extreme to another. You’re much better off just getting your parameters within the acceptable range and keeping them stable.
Diet
Red Cherry Shrimp are one of the easier species of shrimp to feed. They are great scavengers and can usually find enough leftover fish food to thrive. If you are keeping a Red Cherry Shrimp species-only tank, supplemental feeding is usually necessary. Since RCS are omnivorous, a balanced diet of plant-based and meat-based food is best.
There are tons of high-quality prepared shrimp foods on the market that will keep your Cherries healthy and bring out great colors. Fluval Shrimp Granules are a great option. Make sure you don’t feed your shrimp too much – overfeeding is the number one way to mess up your water parameters. Scoop out any food that isn’t eaten in 10-20 minutes.
If you don’t want to buy prepared food, I’ve found that most species of dwarf shrimp love vegetables. Vegetables such as Cucumbers, Zucchini, Spinach, and Lettuce work well. Wash them well and boil for 2-3 minutes until soft and watch as your shrimp eat away! Once again, make sure to remove any uneaten food before it starts to rot.
Another thing that aquarium owners love about Red Cherry Shrimp is that they tend to snack on algae. You will commonly find them climbing rocks, plants, and tank walls to get to the best patch. This not only helps reduce the amount of feedings, but also helps keep your tank clean.
Tankmates
Red Cherry Shrimp are about as peaceful as they come – that said, Red Cherries are best off kept in their own dedicated tank. Because of their small size, RCS often become snacks for hungry fish and lack any sort of self-defense.
If you absolutely must add fish to your tank, stay away from aggressive species such as Cichlids. Try to stick to other small, peaceful species such as Otocinclus, Plecos, or Danios.
But what about other shrimp species as tank mates?
On the surface, this makes sense since shrimp are generally peaceful – that said, it is generally advised to only keep one species of shrimp per tank. Since they are such prolific breeders, interbreeding often takes place. This leads to weak, dull colored offspring. Trust me – your better off sticking to one species/color variation.
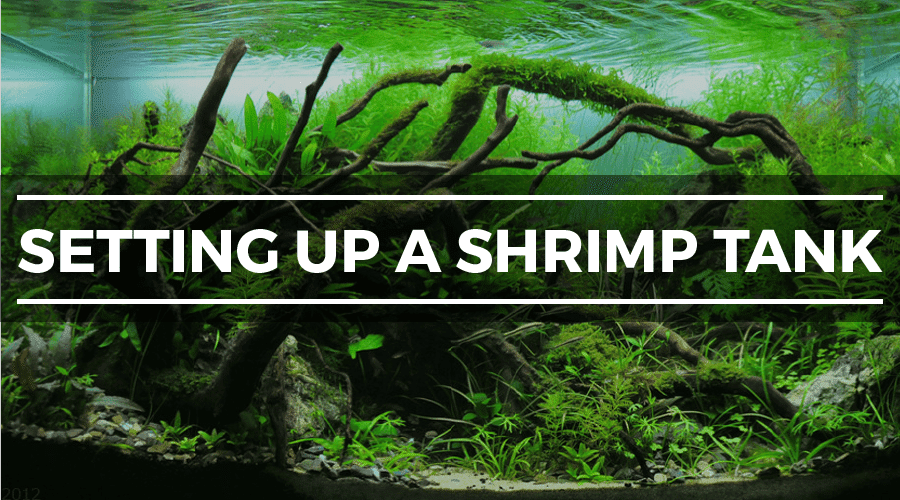
Setting up a Red Cherry Shrimp Tank
Looking to set up your first shrimp tank? This is the section for you.
In this section, we will cover everything you need to know about turning your bare take into a successful shrimp colony – the right way.
Gathering the Equipment
Here are some of the things you are going to set up a healthy shrimp tank:
- Tank: A great thing about dwarf shrimp is that they don’t require large tanks. I would recommend going with the classic Aqueon 10 gallon tank.
- Filter: This part is a little more tricky – since shrimp are very delicate, you have to make sure they don’t get sucked up by the filter. I would highly recommend going with a sponge filter just to be safe – they do a great job at building beneficial bacteria and keeping you tank clean while being gentle enough for shrimp. Keep in mind though, sponge filter require an air pump to function.
- Heater: Shrimp require stable water parameters, especially when it comes to temperature. A heater will help reduce temperature fluctuations, especially at night when the lights are off. I recommend the Cobalt Aquatics NeoTherm 50 Watt.
- Lights: If you’re planning on setting up a planted shrimp tank, lights are a must. I highly recommend going with LEDs as they are more energy efficient, effective, and produce less heat. The NICREW Classic LED 20″-27″ version is the perfect size for standard 10 gallon tanks and is very affordable for lighting.
- Substrate: Another vital part of setting up a planted shrimp tank is the substrate. ADA Aquasoil is a great choice and a favorite among dwarf shrimp experts.
I know that was a lot, but with the equipment listed above you should at least have everything you need to get your tank going.
Planted or non-planted, that is the question…
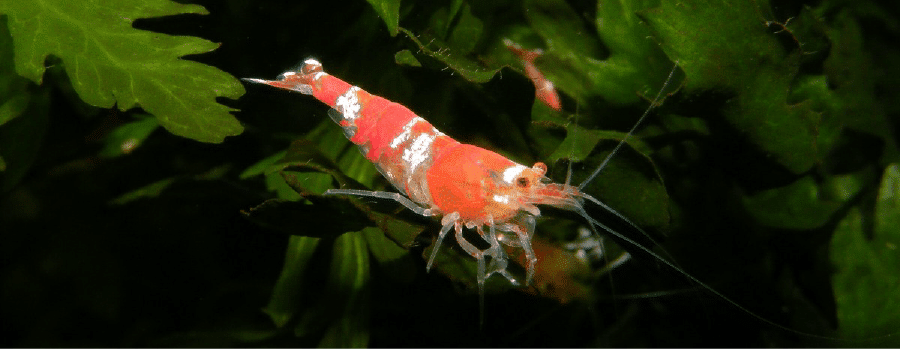
Most shrimp tanks are planted. Shrimp are much more comfortable and “at home” in an aquariums with lot of plants – which makes sense since they replicates their natural environment. That being said, planted tanks are more expensive to set up and maintain than their non-planted counterparts.
In my opinion, plants are a no-brainer. They provide an extra layer of beauty and a much more natural feel that fake decorations simply can’t match. In addition, shrimp are usually much healthier when kept in planted tanks.
Choosing and Laying the Substrate
If you decided to go the planted setup route, choosing a substrate is your next big step. Since plants get a majority of their nutrients from the substrate they’re planted in, choosing a substrate that can hold nutrients well is important. Plain gravel, though maybe fine in the short run, is definitely not the best choice for your plants – and shrimp aren’t a huge fan of gravel anyways.
I recommend going with a a high CEC substrate (meaning it absorbs and hold nutrients well). Substrates such as ADA Aquasoil and Eco-Complete fall into this category and are often pre-packed with nutrients right out of the bag.
Note: Substrates that are packed with nutrients often cause large ammonia spikes when first added to tanks. Make sure you monitor the ammonia spike before adding and fish/shrimp.
Before adding your substrate, make sure that you wash it thoroughly – otherwise, you will end up with a clouded mess.
Tips to avoid cloudy water: After laying your substrate, place a dinner plate in the bottom of your tank. Instead of pouring water directly onto the substrate, pour it on to the plate and allow it to flow over.
Feel free to lay rocks underneath your substrate to create hills/mounds. A rolling landscape with lots of variation is the perfect shrimp paradise!
Adding Plants & Decorations
Once you have the substrate set and the tank filled, it’s time to add plants. Since the shrimp are the main attraction, I would recommend going with a few low light plant species to help keep the process as easy and simple as possible (especially for those that haven’t kept planted tanks before).
Here are a few of the best plants for shrimp tanks:
- Java Moss (Vesicularia dubyana)
- Java Ferns (Microsorum pteropus)
- Anubias Nana (Anubias barteri var. nana)
- Cryptos (Cryptocoryne)
- Flame Moss (Taxiphyllum sp. Flame)
One of my favorite things about aquarium plants is the fact that you can add them before the cycle. In fact, there is good evidence that live plants can actually help speed up the nitrogen cycle.
No longer are you forced to stare at an empty tank for 4 weeks!
Play around with the layout and placements of your plants. This is the part of the process that you can really let your creativity shine. In addition to plants, driftwood structures are a great way to add another dimension to your tank and make it feel more realistic.
Cycling Your Shrimp Tank
At this point, you will have just about everything set up. The substrate is set, your tank is full, and the plants are in their rightful spot – it will be VERY tempting to add the shrimp right away. Unless you’re a first time aquarium owner, you probably know that this is a horrible idea.
Your tank must cycle before any shrimp are added. Skipping this step will mean sure death for most freshwater species, especially shrimp.
But what is the nitrogen cycle? In short, cycling your tank is the process of building up populations of beneficial bacteria that convert waste (fish poop, uneaten food) into less toxin substances.
For the sake of not making this article 20 pages long, check out this guide I wrote on completing a fishless cycle. It has absolutely everything you need to know to get your tank ready for inhabitants.
Breeding Red Cherry Shrimp
Red Cherry Shrimp are the easiest of the dwarf shrimp species to breed. By following these simple steps, you should have a thriving colony of Red Cherries in no time.
Buying Red Cherry Shrimp
This may come as a surprise, but nowadays it’s much easier to buy live Red Cherry Shrimp online rather than in pet stores. It is much easier to get high-quality shrimp when you can simply order a certain grade online rather that pick each shrimp out individual from a tank.
If you ever plan on selling the offspring, I would recommend going with the highest grade you can find (usually Painted Fire Red). Even if you never plan to sell them, higher grades are usually recommended simply for aesthetic reasons.
For breeding purposes, you should start out with a minimum of 10 shrimp – this pretty much guarantees a mix of males and females.
Below is a great 12-shrimp breeding colony that I recommend:
Acclimating Your New Cherry Shrimp
As we explained earlier in this post, dwarf shrimp are very sensitive to changes in water chemistry. As a result, you should take extreme care when adding them to your tank.
Note: Before you even think about adding any shrimp, test your water to make sure ammonia and nitrites are undetectable. A small amount of nitrate is okay, but try to keep it under 20ppm.
By best way (by far) to acclimate your shrimp is with the drip acclimation method. For this method, you will need a large bowl, airline tubing, and a control valve. Follow these steps to drip acclimate the correct way:
- Step 1: Place your shrimp in the bowl/bucket below your tank
- Step 2: Start a siphon from your main tank into the shrimp bucket. Close the control valve (or create a kink in the tubing if you don’t have a valve and secure with a rubber band) so that water drips into the bucket at about 1 drop per second.
- Step 3: Allow the siphon to drip into the bucket for 1-2 hours. Use your tank thermometer to make sure the temperature of the tank water and the bucket water are the same.
- Step 4: Scoop the shrimp out of the bucket into your tank. DO NOT dump the bucket water into your main tank. As a general rule, you never want to introduce water into your tank from unknown sources, especially fish stores.
Inducing Breeding
Most of the time, Red Cherry Shrimp will breed without any special treatment or changes. That said, here are a few things you can do to encourage faster breeding:
- Raise the temperature to 80-81°F: Raising the water temperature by a few degrees “tricks” the shrimp into thinking that it’s summer (the time of year they breed in the wild).
- Provide a lot of plants and hiding places: Most species are much more likely to breed when they feel comfortable – Red Cherry Shrimp are no exception. Providing a ton of plants and hiding places makes you shrimp feel safe and comfortable, encouraging reproduction.
- Feed often in small amounts: Strong shrimp breed more often and produce healthier babies. By feeding your shrimp high quality food, you can dramatically increase the size and healthy of a colony. That said, do not overfeed your shrimp tank and make sure to remove any uneaten food quickly.
Watch for Signs of Breeding
Your Cherry Shrimp might take a little while to settle into their new environment (usually takes about 30 days) – once they’re comfortable, though, breeding will take place on a regular occurrance.
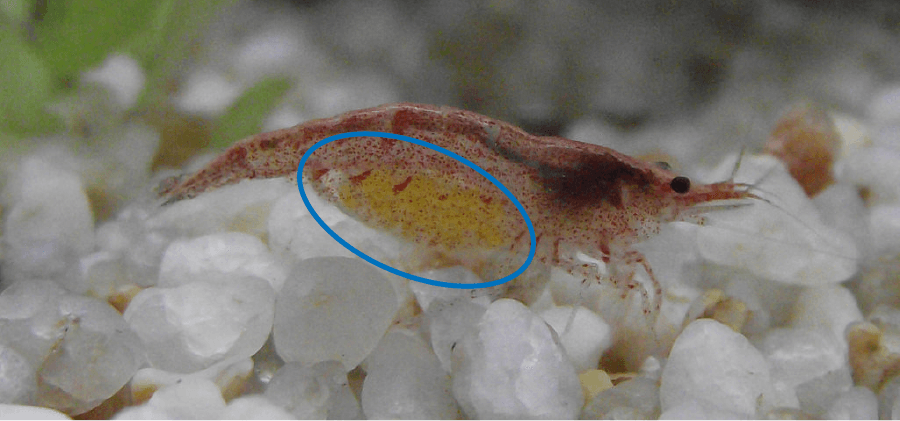
Once the actual mating event takes place, female Cherry Shrimp carry the eggs on the underside of their tails – female Cherry Shrimp carrying eggs are often referred to as “berried”. If you’re lucky, some of your shrimp may be berried when you receive them in the mail.
Eggs are usually a yellowish-brown color and will remain under the female’s tails until hatching. If you wake up one day and all of the eggs are gone, don’t worry – they probably just hatched. Baby Cherry Shrimp are tiny and very easy to miss. In addition, newly hatched shrimp spend most of their time hiding until they are large enough to venture out into the open.
Raising Baby Red Cherry Shrimp
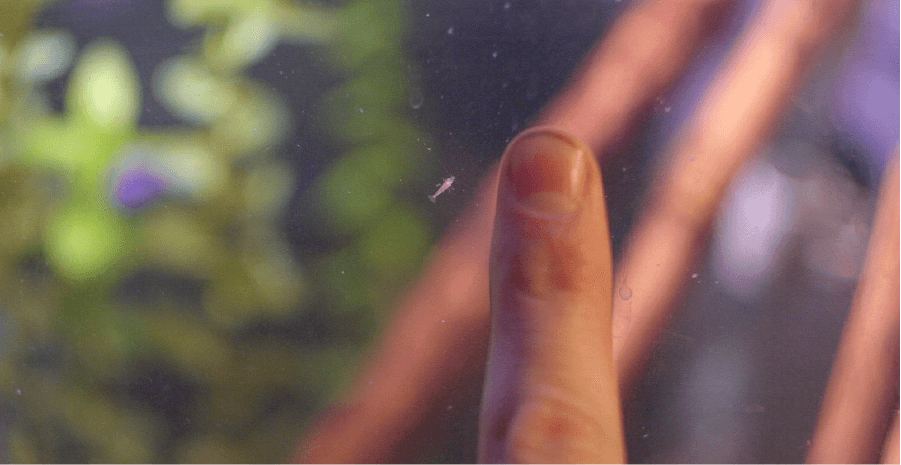
Unlike a lot of shrimp species, baby Red Cherry Shrimp do not go through a larvae stage – they emerge from their eggs as teeny tiny versions of the adults. As a result, they are much easier to care for and have a much higher survival rate than other types of aquarium shrimp.
That being said, there are still a few things you should know about caring for baby red cherry shrimp.
Remember how we talked about Cherry Shrimp being especially sensitive to changes in water conditions? Well this is only more true for baby Cherry Shrimp – try to keep your water chemistry as stable as possible.
Also, set the water temperature somewhere around 80-81 (it should be around this temperature anyways). A slightly elevated temperature is known to increase survival rate and speed up growth.
For the most part, baby Cherry Shrimp don’t require any special feeding. They find more than enough food by scouring the tank substrate and plants. If you really decide to take it seriously and want to increase the survival rate of your shrimp, I recommend Shirakura Baby Shrimp Food.
Final Thoughts
Raising Cherry Shrimp is a rewarding and exciting hobby. As long as you keep your water parameters stable and keep up with the required monthly maintenance, you should have absolutely no problem raising a happy and healthy colony of Red Cherry Shrimp.
