If you’re wondering which aquarium fish are easiest to breed, look no further. There are plenty of both live-bearing and egg-laying fish that you can successfully mate and breed at home.
Keeping a fish aquarium is a fulfilling undertaking in itself. It’s so fun to watch your own little aquatic habitat thrive. Breeding your own fish can be an excellent opportunity to get a bit more involved the hobby.
It’s really not that difficult, as long as you commit to giving your fish a good home and proper care.
In this guide, we will cover a few of the easiest fish to breed as well as some tips on taking care of fry.
Easiest Live Bearing Aquarium Fish to Breed
Live bearing fish give birth to live young. It’s exciting to see brand new baby fish swimming around seconds after being born, rather than waiting for them to hatch from eggs.
Live bearing fish in general are fairly easy to breed and care for. This makes them a good choice for beginning breeders. Plus, livebearers tend to mate more readily, and with less outside manipulation than egg-layers.
Since they are born live, fry from live bearing parents are often have a better chance of survival than the delicate eggs laid by egg laying species.
Guppies
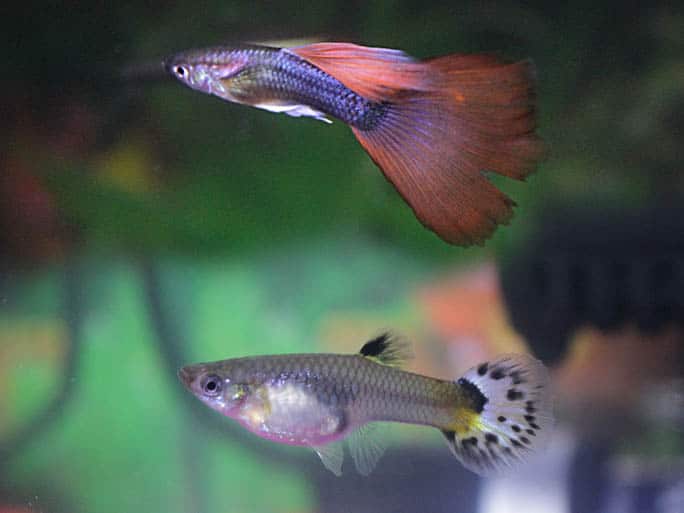
With guppies, it’s usually easy to tell males from females. Male guppies are more colorful, often displaying patterns and/or stripes. Females, on the other hand, are usually an understated grey color and lack the fancy markings.
Guppies will often breed without needing much – if any – human intervention. What’s more, a female guppy can actually store sperm for months after mating with a male.
She can use this reserve to fertilize several batches of eggs, even months after contact with the male. You can simply place a group of guppies in a tank and see which ones mate with each other.
Conversely, you can separate your chosen breeding pair into their own tank. The latter is recommended if you’re trying to encourage certain genetic characteristics in the offspring.
Once the adorable guppy fry arrive, they’ll need some places to hide out while they grow big enough to defend themselves from potential aggressors (which can include Mom and Dad guppy). Give them their own tank, if possible.
Platys
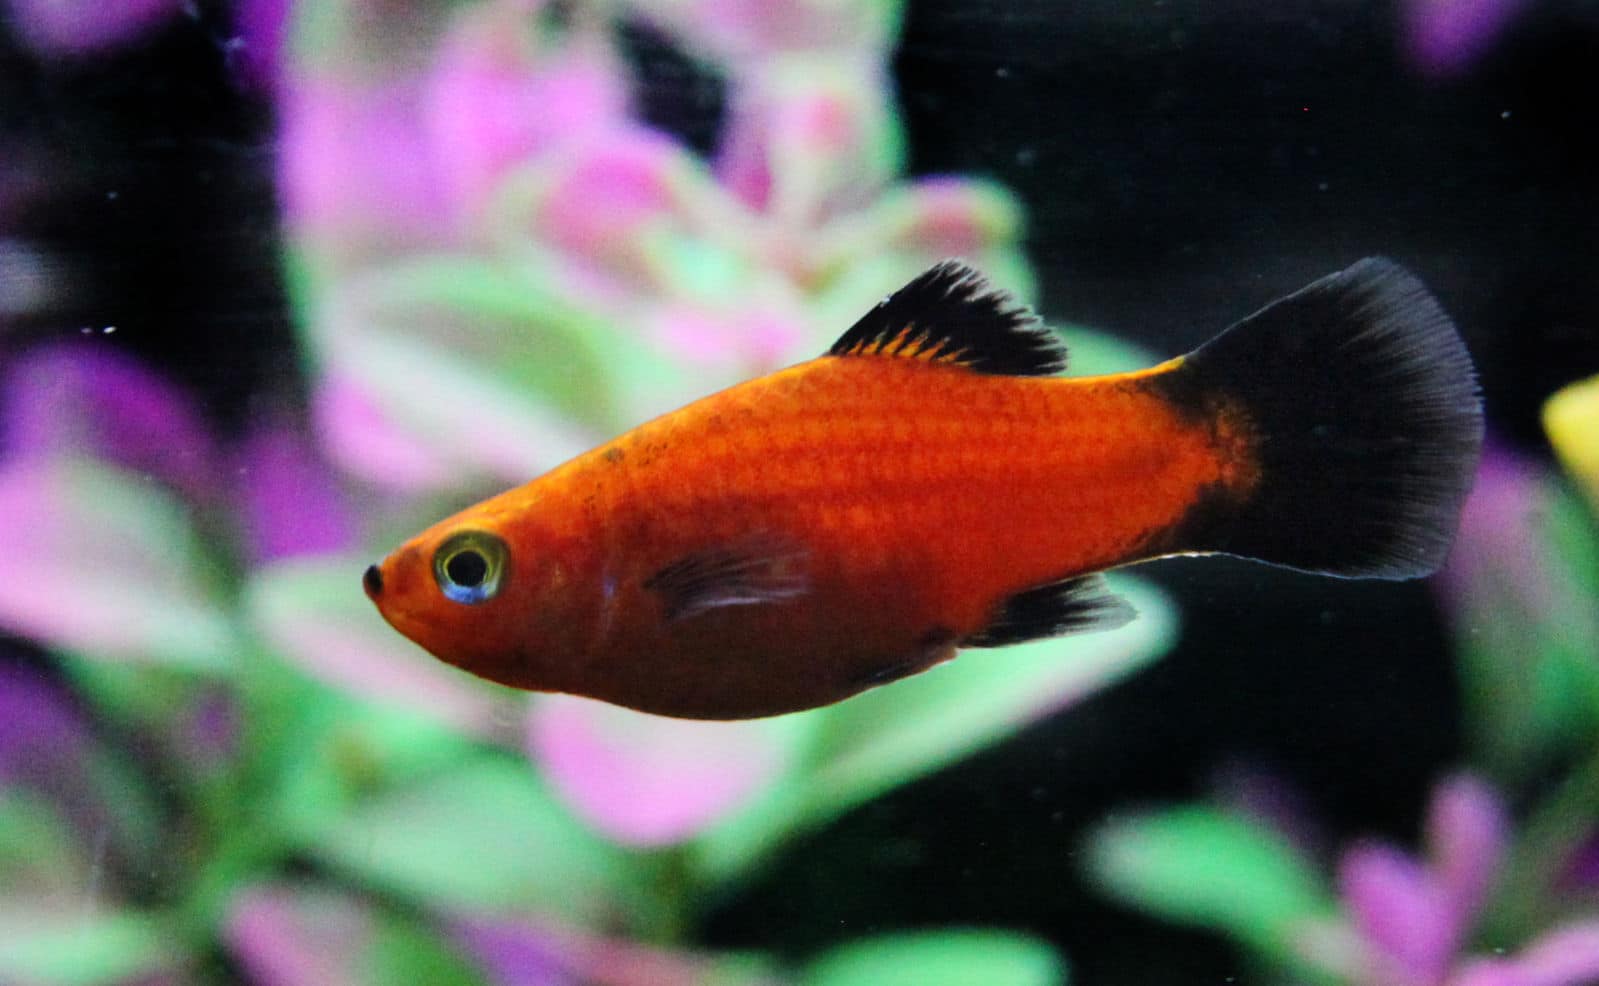
Platys are small and delicate, growing to be only a couple of inches long. They have attractive, vivid colors, often with dramatic dark accents. They’re also hardy, tolerating a variety of water conditions.
While they are relatively easy to breed, platys can and probably will eat their own young soon after they’ve hatched. To avoid this, remove the fry to a separate tank very quickly after they are born.
If you can’t do this, make sure your community aquarium has lots of hiding places, as wayward fry will probably not last long if they’re left to fend for themselves in open waters.
With platys, you should keep more females than males. Around 2 – 3 females to each male is a good ratio. Otherwise, the males may want to breed more than the females are able to safely accommodate.
This can lead to ill health (and even death!) in your female platys.
Pregnant platys will get noticeably plump and develop a telling dark mark – called a gravid spot – near the anal fin. The spot will grow larger as the fish gets closer to giving birth.
Mollies
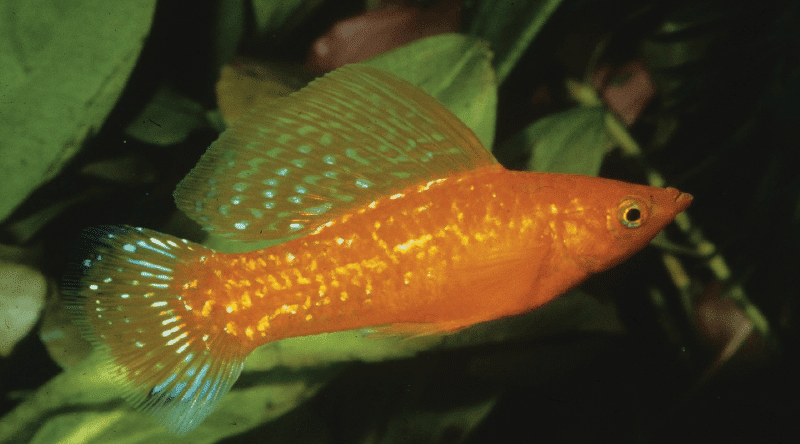
Mollies are prolific breeders, although they do require a bit of additional care in comparison to fish like platys and guppies.
Mollies can grow anywhere from 3 or 4 inches to 6 inches or more, and they can display a wide variety of colors and markings.
This is due mostly to the fact that there are at least a few species (and hybrids thereof) commonly lumped under the “Molly” name.
If you buy juvenile Mollies, be sure to ask how big they’ll get so you can get a large enough tank.
Molly males will breed enthusiastically, and you should have at least 3 females to every male so that any one female isn’t bred to exhaustion (or worse).
Baby mollies are fairly self-sufficient as long as you provide ample food and help them stay out of harm’s way by providing plants and other hiding spaces.
Anableps
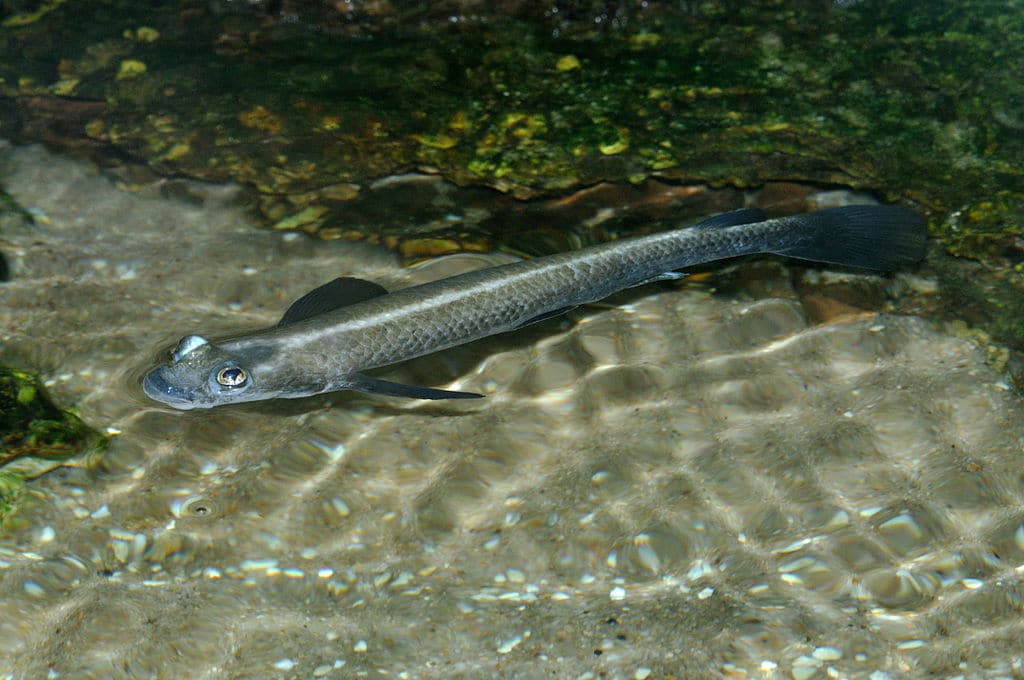
While there are technically only two of them, each eye is oversized and divided into two sections. This enables the Anableps to simultaneously observe above and below the water as it skims the surface.
Anableps are fairly large. They can grow to be a foot long. This, of course, means you will need a pretty good-sized tank if you want to breed them.
Here’s the tricky part about breeding Anableps – They have another distinguishing trait: they are one-sided breeders.
This means that the sex organs of both males and females are situated to one side of their body other the other.
Because of this, a right-sided male can only mate with a left-sided female – and vice-versa (though a few breeders have observed some flexibility of this rule). Make sure you have a selection of righties and lefties in your breeding population.
Also note that male Anableps can become aggressive with one another if they feel threatened or competitive. Make sure your aquarium is spacious and that you have more females than males in the group.
When female Anableps are ready to give birth, they’ll act uncharacteristically aggressive and seek out a hiding place. Once born, the fry should be fairly hardy and ready to eat most foods.
Easiest Egg Laying Fish to Breed at Home
Egg laying fish tend to be a little higher maintenance than live bearing varieties. The species on this list are on the easier end of the spectrum, and suitable for first-timers.
Many female egg layers can produce dozens (if not hundreds) of eggs, which must be fertilized by the male in order to produce baby fish. The eggs and newly hatched fry often require a bit more care than liveborn baby fish.
Zebra Danios
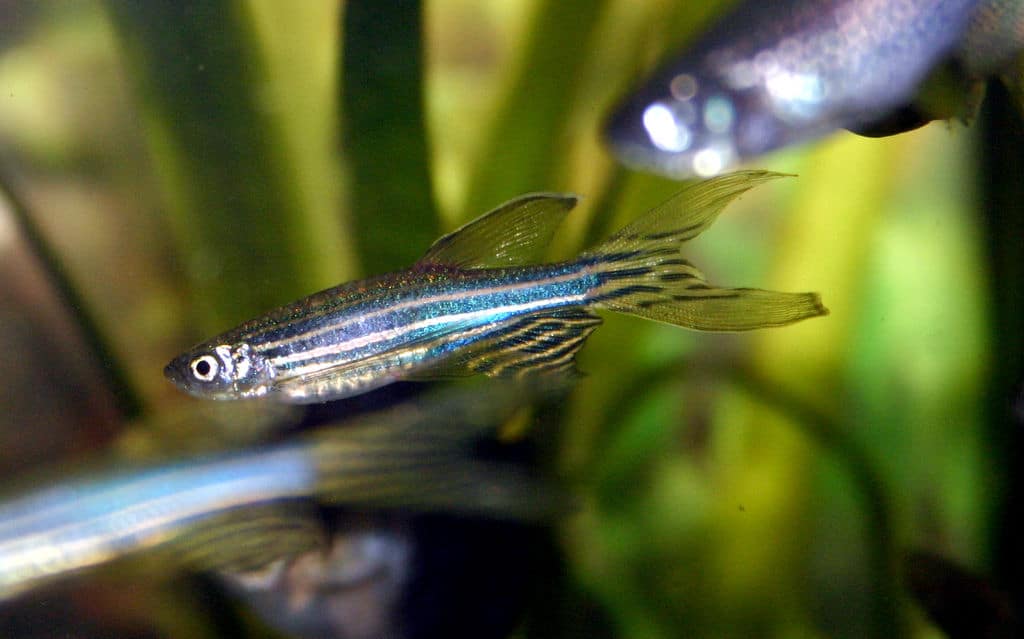
Zebra danios get their names from the zebra-stripe markings that span the length of their body. They’re energetic and fun, remaining compact in size. The biggest they’ll get is somewhere around 2 inches.
Put mating Zebras into their own separate tank until spawning has occurred. With these fish, you should have more males than females in the breeding group (2 males to every female).
Once you see that eggs have spawned, take the adult fish out. The young will hatch quickly, but may not be capable of swimming for another couple of days afterward. Once they do begin to swim around, you can start feeding them.
As babies, these fish are very tiny. They’re also transparent, so keep close eye on them.
Kribensis Cichlids
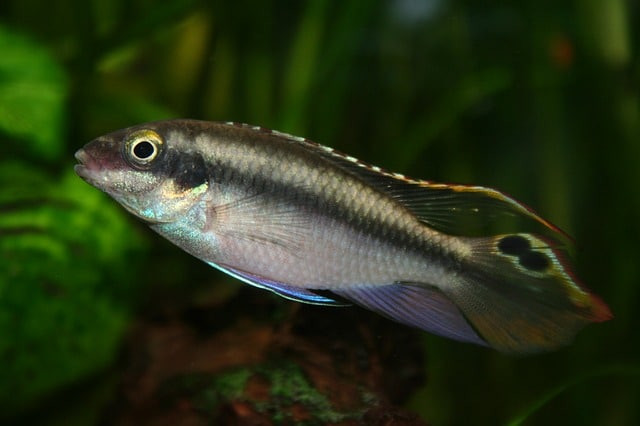
Kribensis cichlids – or Kribs – are pretty dazzling to look at.
Their shimmering rainbow coloration is strikingly exotic. Kribensis cichlids are particularly hardy, withstanding changes in conditions much more easily than many other types of pet fish.
Males Kribs are long and sleek, whereas females tend to be shorter and thicker by comparison. They reach lengths of 3 to 4 inches at maturity.
Unlike most others mentioned here, Kribs can and should be put in pairs for breeding. When you place a male and female together, however, don’t expect them to mate right away.
They will probably take a few days to go about their pre-mating rituals.
During this time, you can help encourage breeding by raising the water temperature just slightly (to around 80 degrees Fahrenheit). You’ll know when female Kribs are ready to breed, because their stomachs will turn red!
Once the eggs have hatched, Mom and Dad Krib will most likely remain together as a couple to co-parent their newborn fish.
Early on, these super parents will transport their baby fish inside their mouths. This might alarm you, considering so many fish on our list are liable to eat their own eggs or fry.
It’s very unlikely that Kribensis cichlids will do this. Once in a while, however, a Krib will eat its own young. Be aware of this and know that this usually only happens with first-time parents, if it happens at all.
Both the male and female Krib will remain with their babies for quite some time after they have hatched, dutifully protecting and watching over them.
While Kribensis cichlids are generally considered to be fairly docile creatures, they will become aggressive when they are protecting their eggs and hatchlings.
Firemouth Cichlids
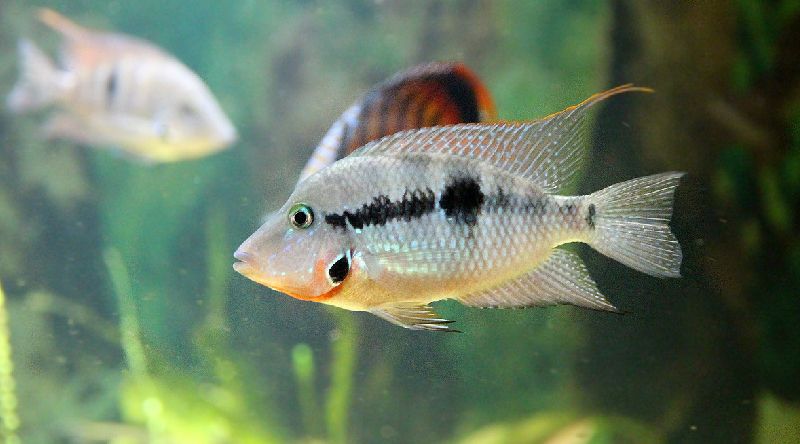
Firemouth cichlids are named for the swath of red that runs from their jawline down the length of their bodies. They can reach lengths of 6 inches and can live for several years when well-kept.
Since they’re so big, make sure you get a large tank for your breeding pair (at least 50 gallons).
For optimal breeding conditions, keep Firemouth cichlid water especially clean. Always use a strong, good quality filter that is sufficient for the tank size. Clean and change the water regularly, too.
Firemouths usually mate quite readily, as long as the conditions are ideal.
You can purchase a mating pair, or you can place a group of juveniles together (aim for around 6-8 fish). They will most likely couple up as they get older.
These cichlids need a flat and fairly smooth surface to lay their eggs on. A female Firemouth will lay her eggs on a suitably-shaped rock or decorative object.
It’s not unusual for Firemouth cichlids to place her eggs on the side of the aquarium, either.
Like their Kribensis cousins, Firemouths are excellent parents. After fertilizing the eggs, the male will provide security detail for the mother as she watches over their future young.
Once hatched, the fry will stay close to their parents until they are several weeks old.
Rosy Red Minnows
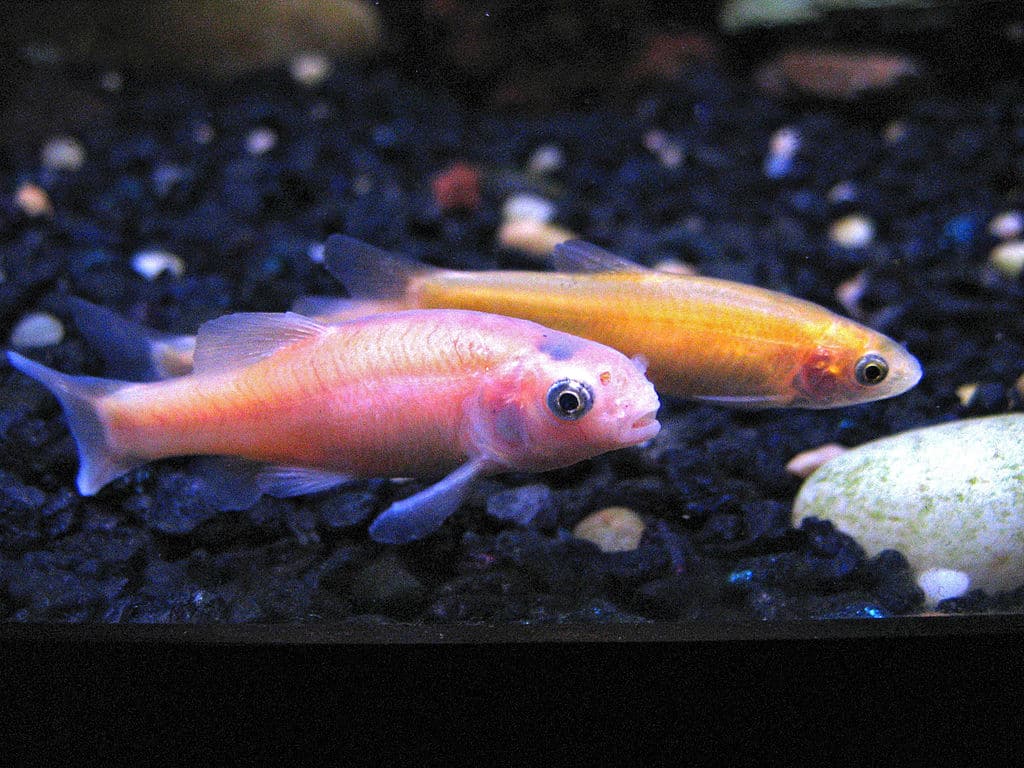
The Rosy Red minnow goes by several names including the Tuffy, the Blackhead minnow, and the Fathead minnow. They are sometimes sold as feeder fish or bait fish. However, many hobbyists enjoy breeding and keep them as pets.
Rosy Reds are usually orange or pinkish in color and are quite small, growing to between 2 and 4 inches long at adulthood. They’re known for being fairly adaptable and for making good neighbors for other non-aggressive fish.
Males are usually a bit larger than females, and the two usually don’t take much outside help to start breeding. Just be sure you’re working with minnows that are old enough to safely and successfully breed.
While they are considered mature at about 6 months old, many breeding experts recommend waiting until they are at least 1 year old.
Once it’s that time, the female Rosy Red minnow can lay hundreds of eggs at once. She’ll place them on a surface like a log or rock, watching over them until they hatch. After that, though, the fry will be on their own.
In fact, you may need to remove the parents to a separate tank to avoid them dining on the hatchlings.
Rosy Barbs
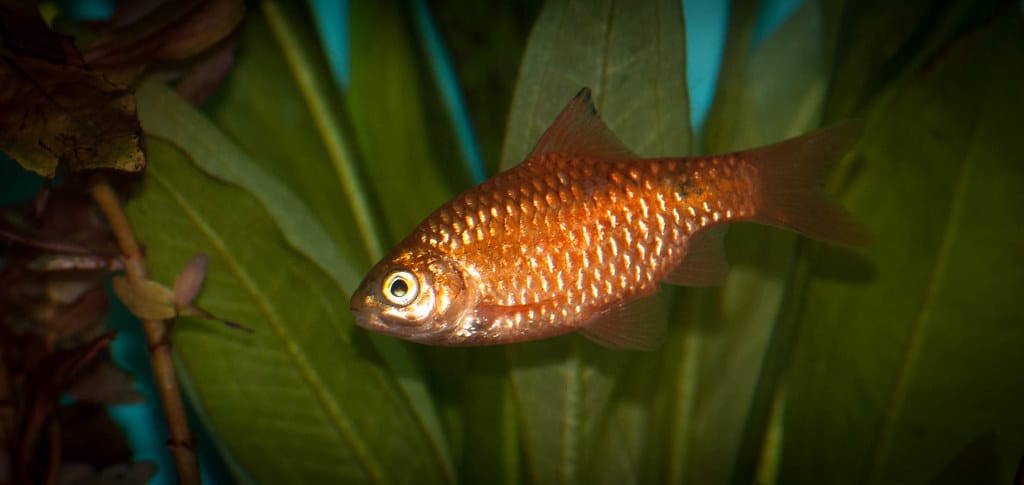
Rosy barbs are pretty little fish, with light coloration that provides a lovely contrast to the signature dark spot located around the tail-end of males.
They mate and breed relatively easily. Just give them lots of nutrient-rich food and make sure to keep the water in their tank exceptionally clean.
If you have a community habitat, it’s best to separate a nice breeding pair from the main tank. Give them a space with lots of hiding places. Once the eggs have been laid, put mom and dad back into the main tank.
These cute little fish can’t be trusted not to eat their little ones. Act fast, too, because Rosy barb eggs will usually hatch within a couple of days.
Caring for Breeding Fish (and Their Babies)
Taking good care of your breeding fish starts with giving them a proper enclosure.
If you don’t already have an aquarium set up at home, get everything ready before you introduce your fish. Make sure to follow species-specific instructions to make sure you’ll be providing the right water conditions for your new pets.
Many types of fish require their own separate space for breeding, and you may need to keep babies away from other fish (even their own parents, in some cases) until they have grown a bit. Be aware of whether you’ll need more than one tank before you get started.
Providing Suitable Hiding Places
Most fish need hiding places for their general health and well-being. Once you start breeding, these become even more important. Hiding is often part of the courting process.
Hiding spots can provide suitable places for egg layers to attach their eggs, and for new babies to get away from danger.
Driftwood can work for this purpose, and you can always purchase ready-made hides from pet shops and sites. You can also make your own using clay pots, logs, or other objects. Just don’t use anything that has paint, glaze, or decals on it (this stuff can be harmful to your fish).
Choosing Healthy Specimens
When picking out fish to use in your breeding project, choose wisely. Look for active fish who have a healthy appetite and good coloration. Watch out for these signs that a fish could be ill or injured:
- Broken, tattered fins
- Lack of energy and enthusiasm
- Little or no appetite
- Dull colors
- Sporadic or unnatural movements
- Floating more than swimming
Feeding Your Breeders (and Your Babies)
When you are preparing your fish for breeding, it’s essential to ensure they get an especially nutritious diet. Most fish are omnivorous, so this means they’ll need lots of vegetable matter as well as animal protein.
As for feeding baby fish after they’ve hatched, you’ll need to offer food that’s small enough. This can mean baby brine shrimp and other very small aquatic animals.
You can also use flakes and wafers (as long as they’re cut or shredded into tiny pieces). In addition, you can make or purchase special baby fish food – often called infusoria.
About Infusoria
Infusoria is a word used in the fish hobbyist community. It loosely refers to a number of aquatic organisms that are suitable food for fish fry. Generally, it includes any combination of the following:
- Vorticella
- Amoebas
- Paramecium
- Algae
- Eglena
- Stenors
- Rotifor
Infusoria is an excellent first food for newborn fish, providing high nutritive value to give them the best shot at surviving and thriving.
Home aquariums do usually have some of these organisms present. However, it’s usually not enough to sustain a newly hatched brood of fish fry.
The good news is that you can actually create your own infusoria. This is a cool science project that’s actually really cheap and easy to execute.
There is not an exact recipe for doing this. Here’s the idea:
Scoop some water out of your aquarium and place it in a fairly large container such as a bucket, pitcher, or large jar. Next, you need to add something to cultivate those good organisms. One option is to buy a ready-made solution online or from a pet store.
Or, you can go the DIY route and simply add some organic matter to the water. The following are safe to use.
- Straw
- Yeast
- Milk
- Grass
- Lettuce
- Banana peel
- Potato (raw)
After adding your starter ingredients to the water, place the container where it will get some sunlight. After a few days, the water should begin to cloud up. This is a good indication that you’ve successfully created a little colony of delicious microorganisms.
To feed your fry the infusoria: scoop, skim, or siphon the cloudy portion of the water out and add it to your aquarium.
Like all babies, fish fry need to eat often when they’re very young. As in, 5 or 6 feedings per day at minimum. If you’re making your own infusoria, you may want to do a few simultaneous batches to ensure you have plenty for your hungry little ones.
A Few Last Things About Breeding Fish in Your Home Aquarium
- Before you begin breeding aquarium fish in your home, have a plan for what you’ll do with all the babies. If you plan on keeping them around, make sure you have ample space and supplies to care for them properly. If you’re thinking about selling them, do some legwork ahead of time to set yourself up for success.
- Eggs and tiny fry can get sucked into certain types of filtration systems, particularly HOB (hang-on-back) filters. Use care when putting together a habitat that will support eggs and babies.
- Reduce the risk of your babies becoming a snack in your community tank by ensuring that all tank inhabitants are well fed.
- Always ask the breeder, store, or site where you get your fish for any specific care and breeding instructions.
You can buy specially made spawning mops, breeding nets, and other aids to help you catch and keep track of eggs. These can be very useful, just be sure to follow the manufacturer’s instructions carefully and only use products that are suitable for the type of fish you have.


OMG!!!! this totally worked!