You must know how to acclimate fish to safely transition your pets to their new home. Acclimation helps your fish to become used to an environment different than what they’re used to. The water parameters in their transport bag are likely different than your aquarium. Usually, the pH in the bag drops, and the ammonia spikes.

Without acclimation, fish will go into shock and may or may not recover.
There are two safe ways to acclimate your fish: the “bag” and “drip” methods.
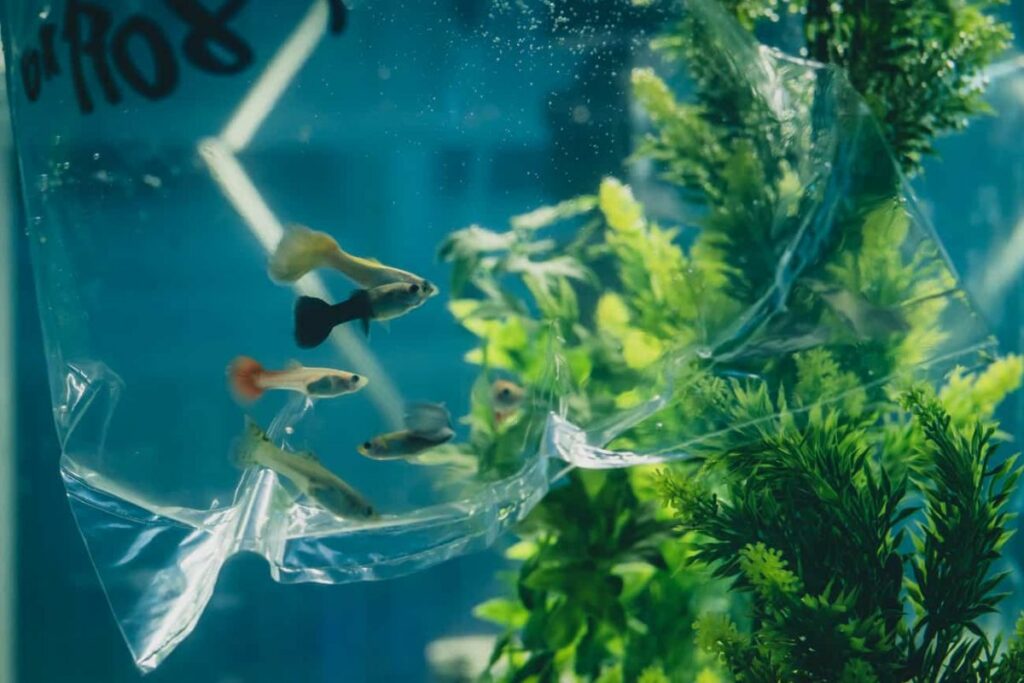
The “bag” method uses the bag that the fish are transported in. You’ll add small portions of the aquarium water to the bag until the new fish becomes used to it.
The “drip” method is similar but exposes your fish to smaller amounts of water over a more extended period. Water drips from the aquarium into a bucket containing your new fish. The drip method requires more patience but is easier on your fish.
You can use these two acclimation methods with new fish from the pet store. You can also use them when transferring fish from one aquarium in your home to another.
There are other considerations when acclimating your fish, such as its tank mates. Many fish don’t take kindly to new fish being introduced to their space. You’ll need to watch for aggression and mitigate any harassment.
Also, consider that acclimating saltwater fish is more complicated than freshwater fish. They are often more sensitive to water parameters, and you must match salinity. Fish will go into shock if you don’t match the salinity.
How To Acclimate Fish Using The Bag Method
Acclimating fish is essential because, without it, fish may go into shock. Shock can leave them stressed and ill or may even kill them.
To acclimate fish, follow these steps:
1. Float The Bag In Your Tank
Most fish stores send your new fish home with a paper bag covering the plastic bag holding them. The paper bag calms your fish and keeps them stress-free on their way home.

Once you get home, you don’t want to pull your fish out into direct light. Keep your house on the darker side to keep them calm. Dim the lights or close your curtains to provide them with some darkness.
You’ll also want to wash your hands and lower arms to remove any perfumes or lotions that may harm your fish.
First, take the rubber band off the bag. Second, roll back the top of the bag a few times to create a little bowl. Third, place the bag inside the tank so it floats on the water’s surface. You may need to roll the bag several more times if it seems unstable.
You may need help keeping the bag stable, even if you fold the bag many times. You can use an algae clip to secure the bag to the side of the tank.
You will allow the bag to float for about 10-15 minutes.
Floating the bag helps the water adjust to the aquarium’s temperature. A gradual temperature change helps prevent shock when adding your fish to their new home.
Floating the bag also gives the new and old fish time to become acquainted. The old fish will come up to the bag to check out their new tank mates. It’s an excellent opportunity to see how your fish will interact and for you to spot any potential problems.
2. Add Water To The Bag
Next, you’ll add water from the tank to the bag of water. Performing this step is crucial. The water parameters in your tank are likely drastically different than those in the bag. Adding the water from the tank to the bag allows the fish to get used to the change in parameters.
Do not add a bunch of water at once; that defeats the purpose of acclimating. Instead, add about half a cup of water from the tank to the bag. Then, allow your fish to sit for about 10-15 minutes and get used to their new water.
Continue adding half a cup of water to the bag every 10-15 minutes.
Test The Water
Periodically test the bag water as you add new water. You’ll need to test for pH, temperature, ammonia, nitrites, nitrates, and hardness. The water quality in the bag should closely match that of the tank before transferring your fish.
Keep adding water to the bag until you get the necessary test readings.
You may need to dump half of the bag’s water if the bag gets too full. Continue adding water until the water parameters are stable. Don’t give up because the bag gets too full; it doesn’t hurt to dump out some of the old water.
3. Transfer Your New Fish To The Aquarium
Once the water parameters in the bag are suitable, you can transfer your new fish to the aquarium.
Use a net to transfer your fish from the bag to the aquarium. Doing so prevents any of the bagged water from getting into your aquarium. Make sure to choose a net larger than your fish, and be careful not to get their fins caught. Place the net into the aquarium and allow the fish to swim out.
NEVER add the water in the bag to your aquarium. The bag water is usually full of ammonia, so you don’t want to add the dirty water to your tank. Instead, dump it.
You’ll also want to watch their behavior for signs of shock. Your fish should not go into shock if you properly acclimate them, but the risk is always there.
The “Bag” Method, In Short
Follow these steps to acclimate your fish:
[1] Float the bag in your tank for at least 15 minutes, so your fish get used to the temperature differences.
[2] Add water to the bag — about ½ cup every 10-15 minutes.
[3] Periodically test the water. Acclimation is complete once the water in the bag matches the aquarium’s water.
[4] Transfer your fish from the bag to the aquarium using a net.
The Importance Of pH
The most important thing you can do when acclimating your fish is to match the pH. Fish can go into pH shock from slight differences between the tank and bag water. Test the pH of your aquarium and the water in the bag. Don’t transfer your fish to the aquarium until the pH in the aquarium and bag match. Fish can go into pH shock over a small 0.5 pH difference.
It’s also essential to research what pH range your new fish will need to survive. It should be within the range that your current fish need. Don’t add new fish to a tank whose pH will not suit their needs.
How Long To Acclimate Fish
To be done correctly, fish acclimation will likely take about an hour. There is no set amount of time for acclimating your fish. You’ll know that acclimation is complete once you test the bag water. It should closely match the aquarium water. In some cases, it may take longer than an hour, especially with fish that are especially sensitive.
How To Acclimate Fish Using The Drip Acclimation Method
I recommend drip acclimation for all fish, especially saltwater fish. They are more sensitive to changes in the water parameters. The drip acclimation method is gentler than the bag method.

1. Add Your Fish To A Bucket
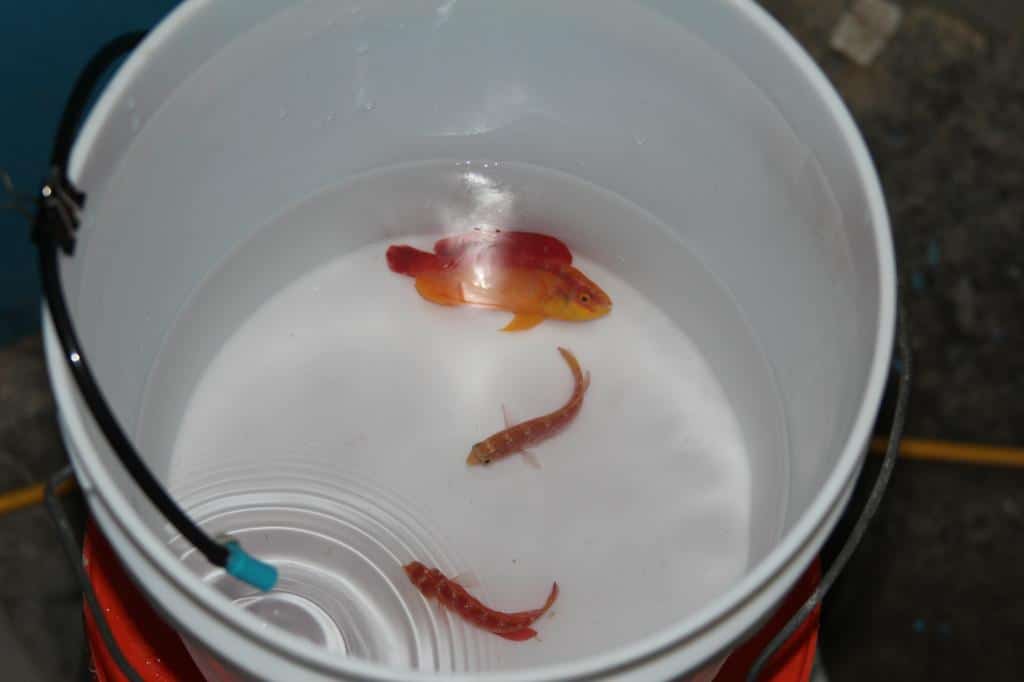
To drip acclimate your fish, you’ll first need to pour them into a clean bucket of water. Do this gently, so you don’t injure your fish.
I recommend buying a bucket that you only use for your aquarium. Avoid using buckets from around the house. They may contain residual chemicals or other harmful substances.
Often, the bag may not have enough water to cover the bottom of the bucket and allow your fish to swim. All you need to do is tilt the bucket at an angle to give your fish more depth to swim. Use a book, box, or something similar to tilt the bucket.
2. Setup The Drip
Next, you’ll set up the drip. You can make your drip tube if the materials are available. All it requires is a length of air tubing and an adjustable valve. You can also tie knots into the tubing to control the flow rate if you don’t have an adjustable valve.
I recommend buying a drip tool designed for acclimating fish. They come equipped to hang over the side of your tank into the bucket. They’re cheap enough that they’re worth buying.
Next, place one end of the tubing into your aquarium. You’ll need to suck on the opposite end of the tubing to begin the siphon. Watch the water as it comes through the tubing to prevent sucking it into your mouth. The water will only take a couple of seconds to pull through the tubing.
As the water reaches the end of the tubing, remove your mouth. Firmly place the pad of your thumb over the end of the tubing. Doing this maintains the pressure inside the tube. It also prevents the water from flowing back into the aquarium.
Before allowing the water to enter the bucket, you’ll need to adjust the flow rate. Changing the flow is simple if you have an adjustable valve. You’ll twist the knob until the water slows down to a drip. It’s a little more difficult if you’ve decided to use knots. You’ll need to pull the knots tighter until the water slows down.
The rate of the drip should be 4-5 drips per second but no more than 6-7 drips per second.
Saltwater Fish
There are also drip acclimation tubes explicitly designed for saltwater fish. While the new water drips through the tube, a device on the tube also measures the water’s salinity.
Before transferring your fish, you must match the salinity of the bag’s water to that in the aquarium. Adding your fish to a different salinity is extremely dangerous and stressful. Most saltwater fish need salinity between 1.023 and 1.025. The exact salinity your fish needs depends on the species. So, do research before making any purchases.
3. Get Rid Of The Old Water
The drip method takes longer than the bag method, but patience is essential. Wait until the water in the bucket has doubled, then stop the siphon. Next, you’ll want to remove half the water in the bucket. Doing so removes much of the original water from transport. The safest way to get rid of the old water is to use a small container or cup to scoop it out. Dump the water down the sink.
Next, you should restart the siphon and continue with drip acclimating. Your fish should be acclimated once the water in the bucket has doubled again.
4. Test The Water & Add The Fish To The Tank
You can follow the “bag acclimation” directions for testing your water. The water in the bucket should be almost identical to the water in the aquarium. Then, it’s safe to transfer your fish.
Corals
Many corals produce excess slime during transport and acclimation due to stress. You’ll want to avoid introducing this slime to your aquarium. After acclimating, hold the coral by its skeletal base. Gently shake it inside the bag to remove the slime. Then, you can add your coral to the tank without the messy slime.
NEVER handle your coral by the fleshy part of its body.
Transference to a new tank is incredibly stressful for invertebrates. Your coral may only open up a few days after introducing it to its new environment. Such behavior is expected, so you needn’t worry about it.
The “Drip” Method, In Short
Follow these steps to acclimate your fish:
[1] Gently pour your fish into a clean bucket.
[2] Start your siphon — use an adjustable valve or knots to control the water flow. The flow rate should be about 4-5 drips per second.
[3] Once the water double in volume, remove half of it.
[4] Restart the siphon. Allow the volume of water to double again.
[5] Test the water — acclimation is complete once the water in the bag closely matches that of the aquarium.
[6] Transfer your fish from the bag to the aquarium using a net.
Which Acclimation Method Is Better?
The drip acclimation method is better than the bag method. The drip method is more gradual and makes it easier for your fish to adjust to their new water. There is also less work on your part.
Still, both methods work well and will safely acclimate your fish.
How To Acclimate Fish From One Tank To Another

Acclimating your fish from one tank to another is the same as transitioning them from a bag from the store. You can follow either above methods to switch tanks. You won’t use an actual bag for the “bag” method. Instead, you need a small bucket or container for your fish. Still, the method is the same.
You will need to put some of the old aquarium water into the bucket or container. Then, net your fish into the bag or bucket to acclimate. Then, simply follow the above directions for acclimation.
Introducing New Fish To Old Fish
As you’re adding your new fish to your aquarium, you may notice that the old fish try to harass or attack them. To prevent this, give your older fish some food while adding your new fish to keep them distracted.
You can also move around the decorations in your tank to create a new setup. Changing the decorations dissolves established territories. Your old fish should no longer be territorial and will be less likely to harass your new fish.
Another option is to place your original fish in a small, plastic critter keeper or breeding box. The box will keep the aggressive fish contained in a small area of the tank away from the new fish. Give your new fish several hours to explore the tank and find safe hiding places. Once you add the original fish back to the tank, the new fish will have a better chance of fleeing and hiding.
Extra Tips
Adding new fish to your aquarium is exciting, especially if it’s your first tank. Still, if you want your fish to be happy and healthy, you must give them time to acclimate. It is a timely process, but it’s worth it, so have patience.
What If Your Fish Appear Lifeless?
Don’t immediately give up if you get home and your new fish appear lifeless. Bagging and transport are incredibly stressful for fish. They may go into an inactive, almost lifeless, state. Continue the acclimation process, and they may begin to perk up. After following the acclimation process, you can tell if they are truly dead.
Do Not Use Airstones
Do not add an airstone to the bag while your fish are acclimating. An airstone increases the pH in the water and exposes your fish to higher ammonia levels. Get your fish home quickly and follow the proper acclimation procedure. They will not suffer from a lack of oxygen.
Keep The Lights Off
Keep the lights off for several hours after adding your new fish to their aquarium. Doing so reduces stress and gives them time to get used to their environment.
Boost Your Fish’s Slime Coat
Add a bit of API Stress Coat to the aquarium after adding new fish. Stress Coat increases your fish’s slime coat. The slime coat boosts their health and helps prevent them from getting sick. API Stress Coat is also a dechlorinator that neutralizes ammonia and heavy metals. It can help rid the tank of any ammonia that has made its way into the tank while adding your fish.
FAQs
Fish usually survive for about eight to nine hours in a bag without extra oxygen. Many fish stores supplement their bags with oxygen, allowing fish to survive up to 48 hours.
The only time a fish should stay in a bag for up to 48 hours is if it’s being shipped. Even then, it’s better to pay extra for overnight shipping to decrease stress. Even though fish can survive a long time in bags, they shouldn’t have to. Getting them home and out of the bag as quickly as possible is best.
How many new fish you can add to your aquarium depends on the size of the tank and its ability to handle new fish. Adding more fish to your aquarium increases the bioload. So, you should only add a few fish at a time, generally two to four fish at most. Only add a small group of fish, even to a large tank. The bacteria in the tank may not be able to handle the bioload, and the water may become toxic.
It’s always best to quarantine your new fish before adding them to the new tank. Ideally, you should have a separate quarantine tank to place your new fish into. Fish from the pet store or breeder may have a disease or infection that isn’t visible to you.
By quarantining them first, you protect the fish already in your tank. A reasonable quarantine period is about two to four weeks. They shouldn’t show any signs of sickness or disease during this time. Then, you can transfer your new fish from the quarantine tank to their permanent tank.
Skipping acclimation is likely to cause your fish to go into shock. They will appear visibly stressed and may have trouble breathing. Water conditions entirely different from what they’ve come from may be enough to kill them.
The greatest threat is pH shock. Fish can go into pH shock just from being exposed to pH levels 0.5 higher or lower than they’re used to. Differences in temperature and salinity can cause shock, too.
